

Percentage Preloader
Application |
Flash MX 2004 + |
Difficulty |
Beginner |
Date Added |
9 Dec 2006 |
Source |
|
AutoRating(out of 5) |
**** |
In this tutorial we will tell you how to make this animation.
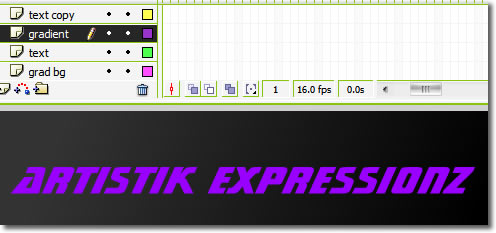
Step 1 : Create a new document in Flash and make at least three layers. Name them as 'Text copy', 'Gradient' and 'Text'. The content of Text and Text Copy would be the same. The bottom most layer i.e; the 'Text' layer will always be visible. We are going to mask a gradient animation on the 'Gradient' layer using the 'text copy' layer. Optionally you can create a layer for background. Preferably we suggest the background be dark and the glint gradient be light for best effects. Also set the speed of the movie to about 24 frames per second for a smooth animation.
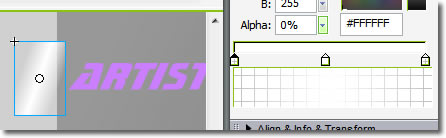
Step 2 : Type some text on the text layer. Preferably a text that is bold. Copy that text when you are satisfied with it. Now select the 'text copy' layer and press 'Ctrl + Shift + V' or 'Edit -> Paste in Place'. On the gradient layer select the Rectangle Tool (R) and draw a rectangle to the left side of the text. Open up the Colr Mixer panel. If it is not visible press 'Shift + F9' or 'Window -> Color Mixer'. With the rectangle still selected select the type in the color mixer to Linear. Now you can apply a gradient. Move your mouse to any of the two points on either side of the fill selector untill a + sybol is displayed. Now click and move it to about the center. Give a white or any color you want to all the three color markers. Then set the alpha of the color markers at both ends to 0%.
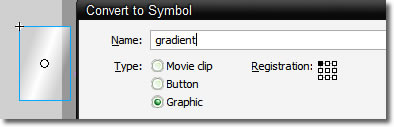
Step 3 : When you are satisfied with the fill and orientation, with the gradient selected, hit F8 or 'Modify -> Convert To Symbol' to convert it into a graphic.
Step 4 : On the gradient layer select frame 30 and press F6 to insert a keyframe.' Extend the timelines for the other layers by selecting each layer, selecting frame 30 and hitting F5 to insert a frame. Position the gradient in the 30th frame and move it to the right side of the text. [Press Shift + RightArrow to move it quickly]. Then click any frame between them, right click and select 'Create Motion tween'.


Step 5 : Now all you have to do is select the text copy layer, right click and select 'Mask'. Thats it Test the movie and enjoy.